
Did You Know?
Google Tag Manager is currently being used on over 31 million live websites around the world.
Rewind the clock a decade or so, and the world of online tracking was mainly reserved for developers. Any time a new tag needed to be added, a skilled dev would be required to install the code directly onto the website and deploy the changes manually. As you can expect, this was often a lengthy process and meant marketers had to rely on the timescales of someone else to implement their tags.
However, the landscape completely changed in 2012 when Google Tag Manager was launched. It may not have been the first tag management system on the scene, but the fact that it was (and still is) free went a long way to it being widely adopted and becoming the market leader it is today.
Now, marketers can install new tags for things like tracking and insights in one central location and without having to delve into the website’s code. As a digital marketing agency, Google Tag Manager makes our collective lives much easier, so there are many benefits to understanding its inner workings.
Google Tag Manager’s Dominance
Applications such as Ensighten and Tealium may have come before, and newcomers like Taggrs and Abliva might be attempting to steal the limelight with their own USPs, but Google Tag Manager is by far the most widely used system of its kind.
Some estimates put its market share above 90%, with adoption being fuelled by how simple it makes the process of adding new tags, its seamless integration with other popular pieces of software like Google Analytics and Google Ads, and the attractive prospect of it being absolutely free to use.
How Does GTM Work?
Often shortened to GTM, Google Tag Manager is a platform that acts as a stepping stone between your website and various marketing software tools, offering a central point to control all of the events you want to monitor. It simplifies this process by limiting the amount of code that needs to be added directly to your website to just one script – the Google Tag Manager code itself.
<script>(function(w,d,s,l,i){w[l]=w[l]||[];w[l].push({‘gtm.start’:new Date().getTime(),event:’gtm.js’});var f=d.getElementsByTagName(s)[0],j=d.createElement(s),dl=l!=’dataLayer’?’&l=’+l:”;j.async=true;j.src=’https://www.googletagmanager.com/gtm.js?id=’+i+dl;f.parentNode.insertBefore(j,f);})(window,document,’script’,’dataLayer’,’GTM-XXXXXXX’);</script>
<noscript><iframe src=”https://www.googletagmanager.com/ns.html?id=GTM-XXXXXXX”height=”0″ width=”0″ style=”display:none;visibility:hidden”></iframe></noscript>
This comes in two different parts, which need to be added to the Head and Body of the website code, respectively. Many CMS systems make this task easy these days, but if you’re still not sure where the snippets need to go, at least it is just one request for the devs rather than having to ask every time you need a new tag added.
Once the script is added, individual tags are then created in the GTM interface to allow you to track specific actions users take on your website, reporting the results in third-party dashboards such as Google Ads or Facebook.
Each action that needs to be tracked – a contact form completion or e-commerce purchase, for example – will require its own tag. And each tag needs its own trigger (a particular set of rules that dictate when the tag should be fired). Once these have been stipulated, you can test that the tag is working properly before pushing the changes to the live site, which is done automatically via the snippet of GTM code mentioned above.
Summary Of Google Tag Manager Benefits
- It’s free
- Allows you to monitor and manage all of your tags from one easy-to-access location
- Offers templates and built-in functions to make creating tags easy for non-coders
- Makes it quick and easy to test whether your tags are working correctly, limiting errors and unreliable reporting
- Gives marketers (and other relevant job titles) the autonomy to make changes in line with their own timescales
How To Use Google Tag Manager
To generate the GTM script, you first need to create a Google Tag Manager account. If you’re already using Google Analytics, then you can do this by selecting the Tag Manager logo within the accounts menu. Otherwise, just head to the home page and create your account from there.

Once the account is created and the code is added to the website, you can begin creating tags. The first thing to do is to create a Google Tag. This is something that Google is pushing more and more to encourage flawless integration of all its services, and it may well become mandatory in the future.
Formally known as a GA4 Tag, the Google Tag is simply a way of creating Google Analytics tracking within GTM. So, if you already have this tracking installed on your site directly, be sure to remove it once you have created your Google Tag to avoid duplicate reporting.
From there, you can go on to create whichever tags you like. What you choose to add will depend on which other pieces of software you are using, as there are tag templates that integrate everything from Google Ads to Hotjar. And it’s not just tracking either. Tags can be used to add chat functionality, embed lead capture forms, A/B test landing pages, and so much more.
How To Create New Tags
The process of creating a new tag is much simpler than having to code it directly, but there are still some aspects that need to be understood before you can be sure your new additions will reliably report the events you want to cover.
Follow the instructions below to build a new tag:
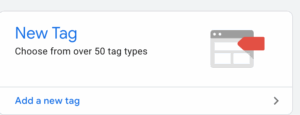
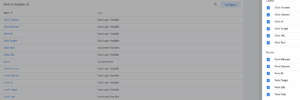
- Select ‘New Tag’ from the Overview menu. Alternatively, you can click ‘Tags’ in the pop-out menu on the left and then click ‘New’ in the top right corner
- Give your tag a name. It’s best to include a reference to what the tag will be monitoring, as well as which software platform it will be used for. For example, ‘Contact Form Completions | Google Ads’

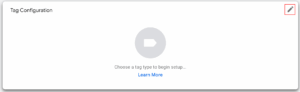
- In the ‘Tag Configuration’ box, click the pencil icon to edit
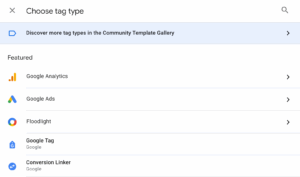
- Choose the type of tag you wish to create. You can select from the list of third-party options, use the search feature to find something not featured or choose ‘Custom HTML’ to create a more bespoke tag
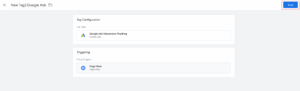
- Work your way down, filling in each field. This will usually include inserting an ID number so that the right account is referenced. For example, for a Google Ads tag, you need to enter your Conversion ID and Conversion Label (which are both provided when setting up a conversion in Google Ads)

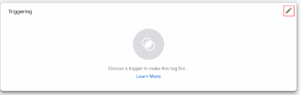
- You then need to click the pencil icon in the ‘Triggering’ box to tell Tag Manager why and when it should record this particular event. If you have any, your previously created triggers will be in a list for you to select again, but you’ll typically need to create a new one
- Click the ‘+’ in the top-right corner and give your new trigger a name
- Click into the ‘Trigger Configuration’ box and choose from the many different variables provided. If you don’t see what you’re looking for, you may need to go into ‘Variables’ in the pop-out menu on the left and opt in to more of the pre-defined options so that they then appear in the list
- This part is probably the trickiest element, and you need to choose the best option if you want to create a reliable tag. Think about what kind of activities a user would complete to achieve the goal you’re looking to track. For example, if you’re tracking entries of a contact form, choose the ‘Form Submission’ option. If you just want to see how many people read a certain page, choose ‘Page View’
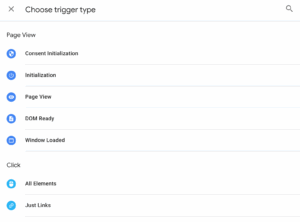
- For some tags, you will want to leave it there. This will mean you’ll track every single event that falls into the category you have chosen. However, if you only want to track one page or one form, using the examples mentioned above, you will need to toggle to ‘Some Pages’ or ‘Some Forms’ instead of ‘All’
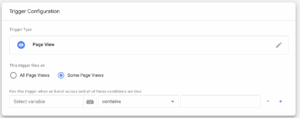
- You then need to define the trigger further by specifying which particular page, forms, etc. you want to keep tabs on. This can be done using a URL, button text, form class or many other options

- Once complete, save your trigger and your new tag
How To Test New Tag Manager Tags
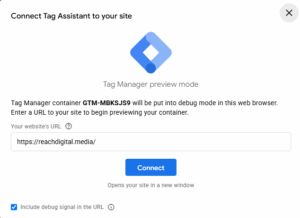
Before you publish the changes to your live website, you need to test that the tag is working the way you want it to. To do this, select ‘Preview’ in the top-right of the screen to go to Google Tag Assistant.
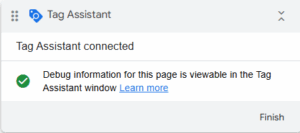
- Copy and paste your URL into the box, and you’ll be taken to your website in Debug mode
- Now you want to perform the action that you hope will trigger the new tag. This could mean going to a certain page, completing a test form, making a dummy purchase or whatever it needs to be.
- When you think you have carried out the action, click back into the Tag Assistant tab in your browser, and you should hopefully see the tag in the section marked ‘Tags Fired’
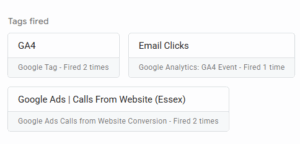
- If you do, great. If not, you will need to go back and edit the triggering of your tag to be more specific
- Once you’re happy things are working as planned, select ‘Submit’ in Tag Manager, give your update a title and description so you know what you changed, and press ‘Publish’
- Congratulations! You’re ready to start receiving more information about how users interact with your website
Summary Of A Tag’s Elements
Tag – A snippet of code designed to record a specific action/event performed by a user on your website. The information is typically sent to a third-party platform such as Google Ads or Hotjar
Trigger – The specific set of circumstances that need to take place for a tag to successfully ‘fire’.
Variable – Used to help define a trigger, a variable refers to a particular piece of information that often changes depending on the situation. For example, URL, Click Text or Page Path.
Google Tag Manager’s Flexibility
As you may expect from a ‘beginner’s guide’, this article merely scratches the surface of what is possible with Google Tag Manager. For some marketers, this is enough, and they can glean everything they need by applying just a few well-conceived tags to their website. However, one of GTM’s biggest benefits is that you can get as in-depth with it as you like.
As you gain more experience, you can start to use some of its more enhanced features to really ramp up your insights. So, whether you move on to adopting server-side tagging to give you even more control or start building your own custom JavaScript tags to tailor things even more to your specific needs, your learning journey with Google Tag Manager has only just begun.
How We Can Help
As a fully-fledged digital marketing agency, the Reach Digital team is experienced with working with Tag Manager and implementing a wide range of tracking options. If you need help learning more about your website users or you want to supercharge your Google Ads with next-level tagging, we’re here to support all your business goals. Contact us today to discuss how we can help.

About the author
Chris Mayhew has great experience in a wide range of digital marketing practices, focussing predominantly on paid media. By implementing iterative A/B tests, he optimises Google and Meta Ad campaigns to maximise results.
Did you find this article useful? Share it with a friend or colleague